Setting Alarm
Alarm is a function that allows users to receive notifications in a specific way when a problem occurs. User can define conditions and methods to receive alarms. Alarm will be triggered and can be received via email or webhook.
How to create an Alarm

Alarm can be created in API Key details page.
-
Go to the API Key you want to set an alarm for.
-
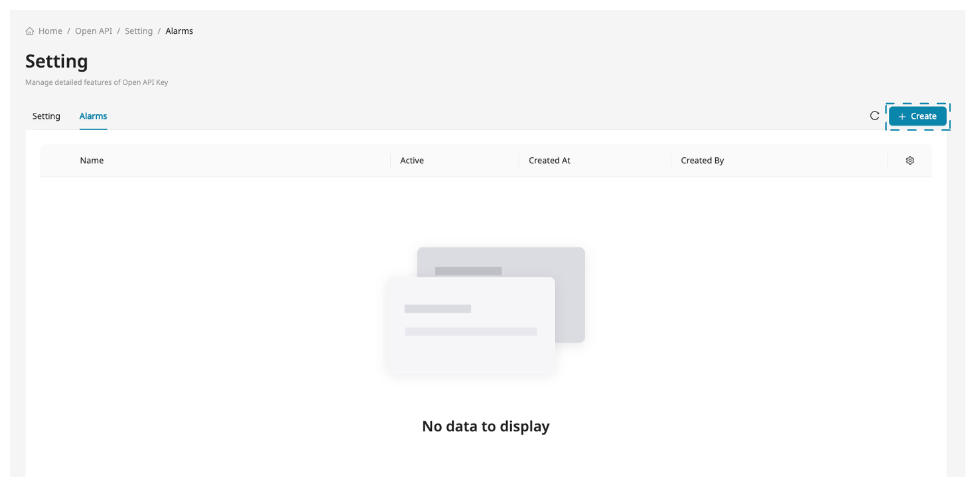
Go to Setting and click Create at Alarm tab.
-
Enter the information below and click Create.
-
Name: It is usually used as a name that can infer the contents of the alarm. It’s an essential value so can’t be emptied.
-
Setting: Trigger conditions of the alarm to be defined by user.
-
Contact: Email to receive notifications. To create an alarm, at least one contact must be specified, and up to 10 contacts are available. If there is no created contact, please create it according to the following guide.
How to create a contact
- Go to the workspace page, click the Contact in Management section.
- Click Create on the contact page.
- Enter the information below and click Create
- Name: It is usually used as a name of the person using the email or the name of the organization. It's an essential value so can't be emptied.
- Email: It is an email to receive the notifications and must be in email format. It's an essential value so can't be emptied.
- If the contact is created normally, an activation email will be sent to the corresponding email address. If you did not receive the activation email normally, please check your spam box. Please note that this email is only valid for 24 hours.
*Please be aware that Contact's email cannot be modified once created.
-
Webhook: The optional value for webhook information to receive alarms.
-
-
When an alarm is created, it is disabled by default. You must activate in order to receive notifications.
-
Name,Setting,Contact,Webhookfields can all be modified even when the alarm is active.
Setting trigger conditions
You can set various conditions to receive an alarm, and the following options are provided.
- Type: The response of the REST API called when Avatar Image is created. You can choose among the fields that are provided: Succeeded Request, Failed Request, Total Request
- Compare by: An operator between Type and Threshold.
- Threshold: The reference value at which an alarm occurs.
- Period: A value in seconds. alarm occurs when the previously set condition is maintained for this value.
Here is an example to help you understand.
Let’s say you set Type=Failed Request, Compare by=Greater than, Threshold=10, Period=300.
Setting webhook
Webhook is a technology that transmits data to a designated URL when an event occurs. In ZEPETO Render-it, alarms can be received not only through e-mail but also through Webhook. Only one webhook can be set per alarm, and the value to be set is as follows.
- URL: The destination web address to which the alarm will be sent. (ex. https://myapplication.com (opens in a new tab))
- HTTP Method: HTTP Method type when alarm is sent through webhook. Supported values are
GET,POST,PUT,PATCH,DELETE. - HTTP Header: Header information included when sending alarm through webhook. It consists of key-values and can be designated up to 10.
Delete Alarm
Permissions are required to delete alarms. Even if an alarm is activated, it can be deleted immediately, and the corresponding alarm will not occur after deleting the alarm. You can’t delete API Key if even one alarm is set, so please organize unnecessary alarms in advance.